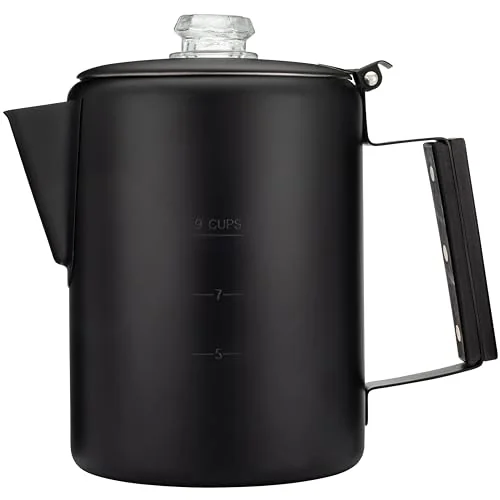
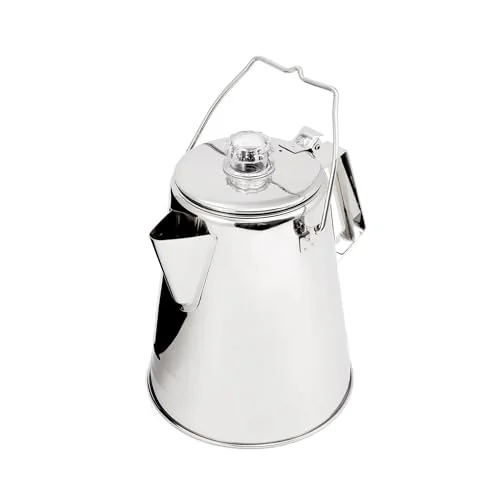
The old-school camp-and-cabin brewer. A percolator cycles boiling water through the grounds again and again for a strong, hot, full-bodied pot — no paper filters, no power needed for stovetop models.
Quick steer — Rugged, simple and unforgiving: it boils by design and never decides to stop. Grind coarse, keep the heat moderate and pull it early — or buy a drip machine instead.
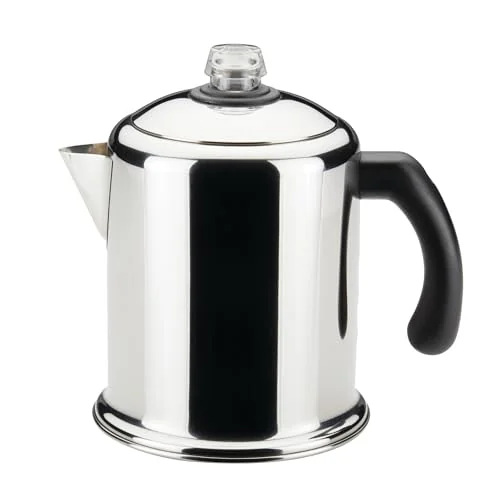
Top pick: Farberware Yosemite 8-Cup Stainless Percolator (8.9/10, Approx. $33.99). The classic stovetop percolator — strong, hot, nostalgic coffee in durable stainless for very little money.
Skip this
Sizing a percolator by the cup number on the box
A percolator cup is a coffee-maker cup, not a mug. Presto's instruction manual for its 12-cup stainless model states that one cup is about 5 ounces of brewed coffee, which puts the full pot at roughly 60 oz — around five 12 oz mugs, not twelve. The same manual asks for at least two cups at a time for best flavour, so the useful range of a 12-cup pot is narrower at both ends than the name suggests.
Spending more here buys convenience, not a better cup: it brews at about a cup a minute on its own and then holds the pot hot. What you give up is the choice to pull it off the heat early.
The BrewSift Score is a 0–10 weighted average of category-specific sub-scores, built from manufacturer specifications, published reviews and aggregated owner reports — not hands-on testing. In this category it weights brew quality 30%, ease of use 20% and build quality 20%, plus 2 smaller factors. How we score →
The classic stovetop percolator — strong, hot, nostalgic coffee in durable stainless for very little money.
Farberware's Yosemite is the percolator most people picture: heavy stainless steel, a glass knob to watch it perk, and a strong, hot, full-bodied pot. Use a coarse grind and pull it on time and it makes the cozy, robust cup percolators are loved for.
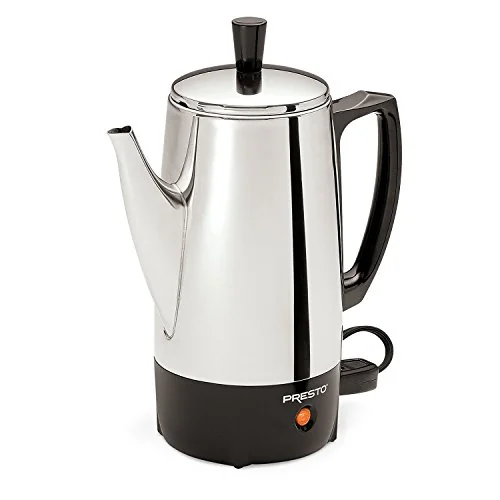
A sturdy stainless electric percolator with a fast brew and a signal light — a reliable party pot.
Durable stainless
Fast ~1 cup/min
Ready signal light
Large footprint
Basic flavor vs drip
What owners say — Amazon owners average 4.5 stars across 19,738 ratings with 4K+ bought in the past month, making it the best-reviewed electric percolator in this roundup.
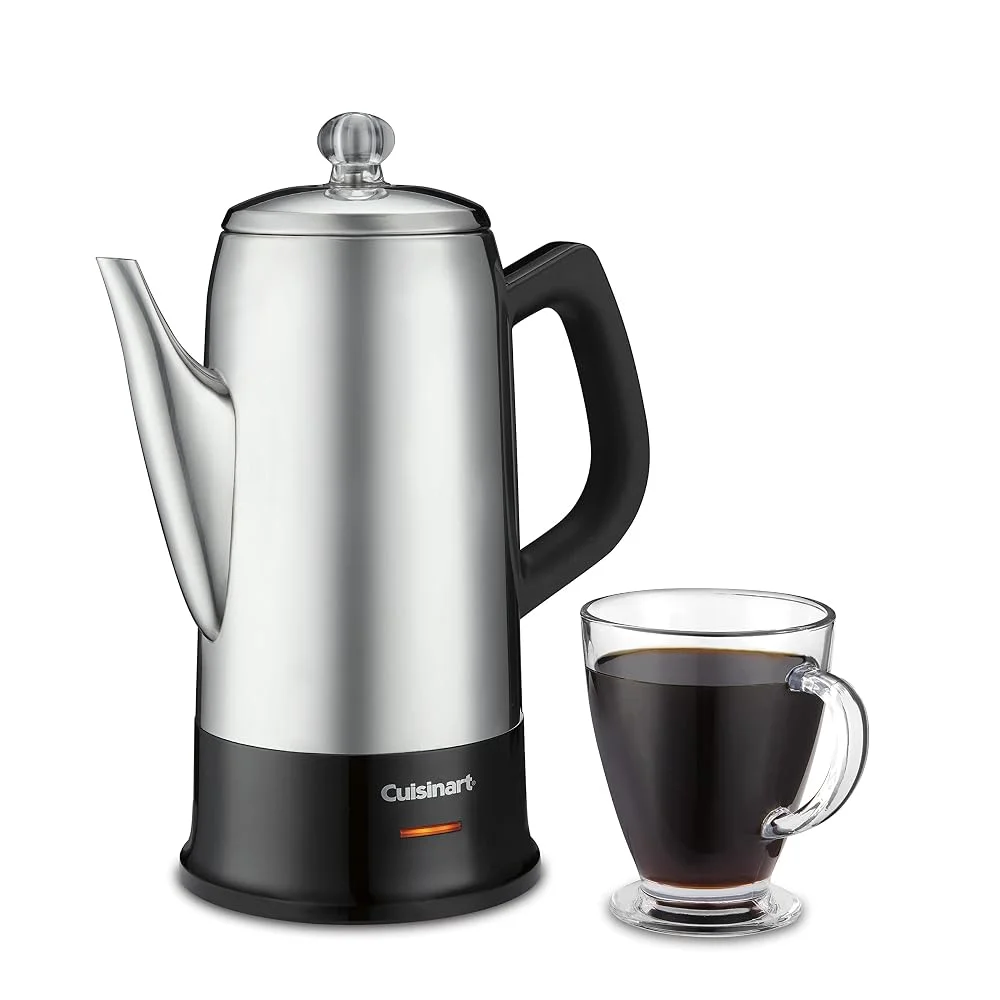
A brushed-stainless 12-cup electric percolator that lifts off its base to serve and keeps the pot warm afterwards.
Cuisinart's take on the electric percolator brews 4 to 12 cups, signals when it is ready, then switches to keep-warm so a pot can sit through a long breakfast. The cordless serving base and stainless body make it the tidier choice for entertaining, and it costs more than the plastic-handled alternatives because of it.
Brews 4 to 12 cups with a ready signal
Cordless base lifts off to serve
Brushed stainless body and keep-warm mode
Costs roughly double the budget 12-cup percolators
Coffee keeps perking if you leave it unattended
What owners say — Amazon owners average 3.9 stars over 653 ratings with 400+ bought in the past month; owners like the build and the cordless base, and the recurring criticism is brew strength versus older percolators.
Percolators are not automatically the paper-free option. Presto ships disposable wraparound filters with its stainless 12-cup model and its manual recommends using one for the best clarity and flavour, noting that 3½-inch disc filters fit as well. The filter is doing what the basket's perforations cannot, which is keeping fines out of the pot — so if never buying filters again was the appeal, check whether the model you are looking at expects them.
What owners actually report
r/Coffeer/campingr/espresso
The percolator conversation splits cleanly by setting. For camping and cabins, r/camping and r/Coffee are consistently positive: a stovetop percolator needs no power, no paper and no fragile parts, and the strong, hot pot it makes is exactly right around a fire. For a kitchen counter the same threads are blunt that a drip machine or a pour-over makes a cleaner cup and that anyone chasing clarity is in the wrong category. The technique advice is remarkably consistent — a coarse grind, moderate heat, and take it off early, because the method recirculates near-boiling water through the grounds and will happily keep going long past the point you wanted. The nostalgia is openly acknowledged rather than argued with: people say they like the sound, the smell and the ritual, and the sub treats that as a perfectly good reason to own one.
Consistently praised
Stainless stovetop percolators for camping — The most consistently praised use in the category: no power, no filters required, nothing fragile, and it works over a fire as happily as on a hob.
Large electric percolators — Owners like them for volume and for holding a pot hot without a warming plate underneath. Presto states its 12-cup stainless model keeps coffee hot automatically.
Paper wraparound filters in the basket — Recommended repeatedly by people who like the method but not the sediment, and it is what Presto's own manual advises for the best clarity and flavour.
Consistently warned about
Fine or espresso grind — The most common cause of a bitter, muddy pot. The basket cannot hold fines and the recirculation extracts them over and over; Presto's manual asks for regular or percolator grind.
Walking away from a stovetop perc — It has no off switch. Threads describe overextracted, scorched coffee as the ordinary outcome of leaving one perking unattended.
Judging capacity by the cup count — A percolator cup is about 5 oz of brewed coffee by Presto's own definition, so a 12-cup pot is closer to five mugs than twelve.
What we didn't pick
Popular options we looked at and passed on, with the specific reason each one fell short.
Glass stovetop percolatorsConsidered 2026-09
Glass lets you watch the perk, which is most of the appeal, but a percolator sits directly on a heat source and gets knocked about in exactly the settings percolators are bought for. Stainless costs about the same and survives a camp box.
Percolators with a plastic basket or perk tubeConsidered 2026-09
The tube and basket sit in near-boiling water for the whole cycle and are the parts that warp first. Presto's manual makes a freely moving perk tube washer a condition of the pot brewing at all, which is a good argument for wanting that assembly in metal.
Thirty-cup and larger party percolatorsConsidered 2026-09
These are catering urns in percolator form. They take a long time to come up to temperature and are sized well past any household's use, and at about 5 oz per nominal cup the number on the box overstates what you need by a margin most buyers discover only after the first pot.
The six percolators BrewSift ranks run $33.99 to $89.86, a 2.6x spread, and it is a spread about electricity rather than coffee: the three cheapest are all stovetop pots and the three dearest all have a cord.
Stovetop vs electric
Stovetop (and campfire) percolators are practically indestructible and need no power, which makes them the default for camping, cabins, and emergencies — a stainless model will outlive most kitchen gear. Electric percolators plug in and shut off on their own once the coffee reaches strength, which is more convenient at home and, crucially, stops the endless re-boiling that turns percolator coffee bitter. If it's for the counter, go electric for the auto-shutoff; if it's for the trail, go stovetop for the ruggedness.
Size it, and know it brews strong
Percolators are rated by the cup — often 5oz camp cups, not mugs — so a '9-cup' pot makes far less than nine mugs of coffee. They also brew a strong, full-bodied pot by design, so many people run them a little under their rated capacity. Match the size to your group: a solo camper wants a 4- to 6-cup pot, while a family or campsite crew is better with a 9- to 12-cup model.
Coarse grind and a basket that seals
Percolators need a coarse grind, similar to French press — fine grounds slip through the basket holes and end up as silt in your cup, and they over-extract into bitterness during the repeated cycling. Look for a basket with a well-fitting lid and small perforations, and use a paper percolator filter disc if you want a cleaner cup. This is the fix for the muddy, gritty reputation percolators sometimes get.
Watch it, don't walk away
The classic percolator mistake is letting it boil and re-boil for ten minutes because 'more is stronger' — it isn't, it's just more bitter. Pull a stovetop pot (or unplug a non-automatic electric one) as soon as the coffee in the little glass knob runs the color you like, usually 5 to 10 minutes after it starts perking. Keep the heat moderate so it burbles steadily rather than boiling hard. Get the timing right and you get the strong, cozy, nostalgic cup percolators are loved for.
Material and cooktop fit
Stainless steel is the sensible default — tough, easy to clean, and induction-compatible if the base is magnetic. Enamel-coated and aluminium camp percolators are lighter and cheaper but chip or pit over time, and aluminium won't work on induction. If you have an induction hob, confirm the base is magnetic before buying; gas and electric coils will take any stovetop percolator.
What actually separates one coffee percolator from another
The brewing mechanism is close to identical across the category: a stem carries boiling water to the top, it showers over the grounds, drains back down, and repeats. So when you read coffee percolator reviews, the differences that matter are hardware, not brewing technology. Look at the basket perforation size, since finer holes mean less silt in the cup. Check how well the basket lid seats, and whether the stem sits firmly in the pot base rather than wobbling and letting water bypass the grounds. Look at the handle attachment, riveted and heat-isolated rather than a thin welded strap, and at the spout, because a well-formed one pours without dribbling down the side. The knob matters more than it looks: glass lets you watch the color and pull the pot on time, but it is the part most likely to break, and replacements are not always available. Owner reviews across the category consistently cluster on the same handful of complaints, namely grit in the cup, hot handles, a leaking lid, and a cracked knob, which tells you those are the real quality axes. Star ratings mostly track build and durability rather than flavor, because flavor depends far more on your grind and your timing than on which pot you bought. A $30 stainless pot and a $55 one will taste about the same. What the extra money buys is a better handle, a tighter basket, and a body that survives being packed in a truck.
Choosing a coffee percolator for camping
Camping is where percolators genuinely beat almost everything else, but not every model belongs on a fire. If you will set the pot directly on coals or a grate, you want stainless with no plastic anywhere near the flame, because plastic handles and knobs that are fine on a kitchen burner will soften, scorch, or melt over open flame. A wire bail handle, or a heavily insulated side handle, lets you lift a full pot with a glove. Check that the lid latches or clips, because a lid that flips off when you tip the pot is a real problem when everything is hot and your hands are full. Enamel-coated steel is the traditional camp look and it is light and cheap, but it chips, and once the coating is broken the exposed steel underneath rusts. Stainless costs more and is worth it if the pot lives in a truck bed or a gear bin. Size up more than you would at home: percolator cups are 5oz, so a 9-cup pot is roughly four large mugs, and four people drinking two rounds will empty an 8-cup pot fast. Two camp-focused options in this category are the COLETTI Bozeman 9-Cup, which ships with paper filter discs for a less gritty cup, and the more compact GSI Outdoors Glacier 8-Cup, though the Glacier has shown as unavailable on Amazon at our latest check. Expect soot on the outside of any pot used over wood, so pack a bag for the trip home to keep it off the rest of your kit.
Ratio, starting water, and heat control
Grind and timing get most of the attention, but ratio and burner heat decide just as much. Start at one level tablespoon of coarse grounds per 5oz percolator cup, so about eight tablespoons for an 8-cup pot, and adjust from there. Because a percolator cycles the same water through the bed repeatedly, going heavier on the dose does not get you the clean strength it would in a drip maker; it mostly gets you more of the harsh flavors. If the pot tastes weak, add time before you add coffee. Starting water matters too. Filling with cold water means the pot spends several minutes coming up to temperature before it perks at all, which is fine but adds to the total time the grounds sit in hot water. Filling with already-hot water gets you perking within a minute or two and shortens the whole cycle, which usually makes a cleaner cup. The trade-off is that a hard boil can start immediately, so drop the heat as soon as it begins. Heat control is the last piece. Once perking starts, turn the burner down to the lowest setting that keeps a steady, unhurried burble. A violent boil pushes water through the basket too fast and too hot, scalds the grounds, and produces exactly the flat, bitter cup percolators get blamed for. On a campfire that means moving the pot to the edge of the coals rather than the center.
Where a coffee percolator loses, honestly
A percolator is not a precision brewer, and it is worth being clear about why. Two things work against it. The water is at or very near boiling when it reaches the grounds, hotter than the roughly 195 to 205F range generally recommended for brewing, and the liquid that cycles back over the bed is already coffee, so the grounds are repeatedly re-extracted with a solution that is already carrying dissolved solids. The result is a pot that is strong and full-bodied but comparatively flat: the delicate acidity and aromatics that make a good single-origin interesting are largely cooked off. If you have spent money on a bright washed Ethiopian, a percolator is the wrong tool for it, and that coffee will taste better from a pour-over or a decent drip maker. Percolators also give you almost no control. There is no bloom, no pour rate, no adjustable temperature. You get grind, dose, and time, and that is the whole instrument panel. Unless you use a paper disc, some fines always reach the cup. What you get in exchange is real: a pot that works on a fire, has nothing electronic to break, needs no consumables, holds heat well, and makes a big batch of hot, strong coffee that plenty of people genuinely prefer the taste of. Buy one for that. Buy something else if flavor clarity is the priority.
Coffee oils are the thing that quietly ruins a percolator. Every cycle deposits oil on the stem, the basket, and the inside of the pot, and once that layer goes rancid it makes every subsequent pot taste stale no matter how fresh your beans are. Wash the pot, basket, stem, and lid in hot soapy water after each use rather than just rinsing, and use a bottle brush on the inside of the stem. Most stainless percolators are technically dishwasher-safe, but hand-washing keeps the exterior looking better and reaches the stem more reliably than a dishwasher spray arm does. Every month or so, run a descaling cycle: fill with water and a few tablespoons of white vinegar, perk it through with no grounds in the basket, then perk two pots of plain water to rinse. Hard water leaves scale in the stem and base that slows the cycle and, on electric models, makes the heating element work harder. The failure points are predictable across the category: the glass knob, the basket lid clip, and on electric models the cord socket and the thermostat that decides when to shut off. Before you buy, check whether the manufacturer sells replacement baskets, stems, and knobs, because a cheap pot with a cheap replacement basket is a much better long-term buy than one where a cracked knob turns the whole thing into scrap.
Percolating on a camp stove
A camp stove is gentler on a percolator than an open fire and harder on it than a kitchen hob, and a few habits make the difference. Stability comes first: a tall, full percolator on the narrow pot supports of a small canister stove has a high centre of gravity, so set the stove on level ground, and choose a two-burner or wide-support stove for anything larger than a small pot. Wind is the second problem, since a breeze across the burner makes the perk start and stop; shield the flame with a windscreen, keeping it clear of the fuel canister so the canister does not overheat. Heat control is the third, and a stove with a real simmer setting is worth more here than raw output, because once the pot starts perking you want the lowest flame that keeps a steady burble. Keep the flame under the base rather than licking up the sides, where it heats the handle and anything on it that is not metal. Finally, plan fuel for the whole brew: a percolator runs for several minutes after it starts perking, which uses more fuel than boiling water for pour-over or instant.
Small or large: sizing a percolator for camping
Percolator capacity is counted in percolator cups, and Presto's own manual defines one as about 5 ounces of brewed coffee. That makes the arithmetic easy once you know it: an 8-cup pot holds roughly 40 ounces, or about three 12-ounce mugs; a 9-cup pot about 45 ounces; a 12-cup pot about 60 ounces, or around five mugs. For a solo camper or a couple, a smaller pot comes up to a perk faster, burns less fuel and packs smaller, and brewing a second pot is easy. For a group of four or more, a 9- to 12-cup pot saves a second round on the stove. The same manual asks for at least two cups per brew for the best flavour, so do not buy a pot so large that you routinely brew it a quarter full. Electric percolators are sized the same way but need a proper outlet, so they suit cabins, RVs and campgrounds with power rather than a campsite. Among the stovetop pots we rank, the COLETTI Bozeman is the 9-cup camp option and the Farberware Yosemite the 8-cup classic.
It over-extracts easily because the same water cycles through the grounds repeatedly at boiling temperature. Coarse grounds, a short perk time and pulling it off the heat as soon as it finishes are what keep it from turning bitter.
Are percolators bad for coffee?
They have a reputation for bitter coffee, but that comes from misuse, not the design. The problem is letting the pot boil and re-cycle the brew for too long, which over-extracts and scorches it, plus using too fine a grind. Use a coarse grind, keep the heat moderate, and pull the pot as soon as it reaches the strength you like — usually well under ten minutes — and a percolator makes a perfectly good, strong, full-bodied cup. It won't have the clarity of a pour-over, but 'bad' is a technique problem, not a percolator problem.
What's the difference between a percolator and a drip coffee maker?
A percolator repeatedly cycles boiling water up through the grounds and back down, over and over, which extracts aggressively and makes a strong, hot, full-bodied pot with some sediment. A drip maker passes hot (not boiling) water through the grounds once, through a paper filter, giving a cleaner, brighter, more nuanced cup. Percolators win on ruggedness, no paper filters, and working without power (stovetop models); drip wins on clarity, consistency, and walk-away convenience. Choose the percolator for camping and strong nostalgic coffee, drip for everyday nuance.
What grind should I use for a percolator?
Coarse — roughly the texture of French press grind or coarse sea salt. A coarse grind is essential because anything finer slips through the metal basket holes and leaves silt in your cup, and it over-extracts into bitterness as the water cycles through repeatedly. If your percolator basket has larger holes, err even coarser, or drop in a paper percolator filter disc to catch the fines and get a cleaner pot.
How long should you percolate coffee?
About 5 to 10 minutes once it starts perking, depending on how strong you like it and your heat level. Watch the coffee color in the little glass knob on the lid — pull the pot (or unplug it) as soon as it looks rich enough, because letting it run longer just makes it bitter, not stronger. Keep the heat moderate so it burbles steadily rather than boiling violently. Electric percolators handle this automatically by shutting off when the brew reaches strength.
Are percolators good for camping?
They're one of the best camp brewers there is. A stovetop or campfire percolator needs no electricity, no paper filters, and no fragile parts — a stainless model shrugs off being packed, dropped, and set right on the coals. It makes a strong, hot pot for a group and cleans up with a rinse. The only skill is watching it so it doesn't over-perc; get the timing right and it's rugged, simple, and reliable exactly where fussier methods aren't practical.
What is the best coffee percolator?
There is no single best coffee percolator, because the answer splits on where you will use it. For a classic stovetop pot at home, the Farberware Yosemite 8-Cup is the model most people picture and the cheapest way into heavy stainless. For camping, the COLETTI Bozeman 9-Cup is the more thoughtful choice, since it ships with paper filter discs that cut the grit you would otherwise get over a fire. For a countertop that brews a big batch and then holds it, an electric like the Presto 12-Cup stainless handles the timing itself and shuts off, which removes the main way people ruin percolator coffee. Decide stovetop or electric first; the rest is capacity and build quality.
What is the best percolator for camping?
Look for all-stainless construction with no plastic near the flame, a handle you can lift while wearing a glove, and a lid that stays put when you pour. The COLETTI Bozeman 9-Cup is the strongest camp option in this category, because the included paper filter discs solve the grit problem campfire percolators are known for, and 9 cups covers a small group at roughly four large mugs. The GSI Outdoors Glacier 8-Cup is the compact alternative campers often name, but it has shown as unavailable on Amazon at our latest check, so it is not one we can point you to right now. Avoid enamel if the pot will be knocked around, since chips expose steel that then rusts.
How do you tell a good coffee percolator from a cheap one?
Judge the hardware, not the brewing, because the perk mechanism is nearly identical across every model. Check the basket first: small perforations and a lid that seats properly are what keep grounds out of your cup. Check the stem fit at the base, since a loose stem lets water bypass the grounds. Then look at how the handle is attached, the shape of the spout, and whether replacement parts are sold at all. Owner reviews across the category tend to cluster on the same few complaints, namely grit, hot handles, leaking lids, and cracked knobs, so those are the details worth reading closely. Spending more mostly buys durability and better handles, not better-tasting coffee.
How much coffee do you put in a percolator?
About one level tablespoon of coarse grounds per percolator cup, and a percolator cup is 5oz rather than a mug, so roughly eight tablespoons for an 8-cup pot. Start there and adjust with time rather than dose. Because a percolator recirculates the same water through the bed repeatedly, overloading the basket tends to add harshness rather than clean strength. If the pot comes out weak, give it another minute of perking before adding more coffee. If it comes out bitter, pull it earlier and grind coarser. A tablespoon per cup with a French-press-coarse grind is the reliable starting point.
Is percolator coffee stronger than drip coffee?
Usually yes. A percolator cycles the brew through the grounds repeatedly, which extracts more dissolved solids than a single pass through a drip basket, so the same dose gives you a heavier, more concentrated cup. But strong is not the same as good. That extra extraction pulls bitter compounds along with everything else, and because the water is at or near boiling, the brighter aromatics get cooked off. A percolator gives you strength and body; a drip maker gives you clarity and nuance. If you want strength without the bitterness, grind coarser and pull the pot earlier rather than dosing heavier.
Can you use a percolator on a camp stove?
Yes, and it is one of the most practical ways to brew at camp. Set the stove on level ground, since a tall full pot on narrow supports tips easily, shield the flame from wind without enclosing the fuel canister, and turn the burner down to a low simmer as soon as the pot starts perking. Keep the flame under the base rather than up the sides, where it heats the handle, and allow extra fuel, because a percolator runs for several minutes after it begins to perk.
What size percolator do I need for camping?
Count on about 5 ounces of brewed coffee per percolator cup, which is how Presto defines a cup in its manual. An 8-cup pot makes about three 12-ounce mugs, a 9-cup pot a little under four, and a 12-cup pot about five. A solo camper or couple is better served by a smaller pot that perks faster and packs smaller; a group of four or more should look at 9 to 12 cups. Avoid a pot so large that you usually brew it a quarter full.
Is an electric or stovetop percolator better?
It depends on where you will use it. A stovetop percolator needs no power, works over a camp stove or a fire, and is nearly indestructible in stainless steel, but it never stops on its own, so you have to watch it and pull it off the heat. An electric percolator brews and then holds the pot hot by itself, which removes the main way people over-perk their coffee, but it needs an outlet. Choose stovetop for camping and cabins without power, electric for a kitchen counter or for serving a crowd.